Photobooth Cloud
Templates Plans Downloads Help
Sign in Get started
Templates Plans Downloads Help Sign in

Product documentation

Organisation guide

Daily operations, event design, galleries, booths, logs, billing and workspace administration.

Security & assurance Administrator manual Public API reference Help centre

Cloud Command

Organisation user guide

Current for CloudBooth 4.7.32. Accounts with access to multiple organisations explicitly choose the workspace they are working in; platform administrators can use Global Settings without entering a tenant workspace. Use this manual to configure a workspace, build visual AR and custom-code experiences, deploy events, manage galleries, monitor booths, investigate logs, use passkeys and administer billing. The documentation is public; features and administrative actions inside the application still appear according to plan and role permissions.

Run an eventDesign, activate, monitor and deliver. Build an interfaceScreens, actions, inputs and animation. TroubleshootLogs, booth status and common fixes.

Quick start

Build and run your first CloudBooth event

This guide is designed to be followed from top to bottom the first time you use CloudBooth. The left navigation always shows every documentation chapter; the reading pane shows only the chapter you select.

Before you start

Have your event artwork ready (PSD is ideal when you want to preserve layers), a Windows booth device available, and access to the camera/printer hardware you intend to use. You can build the event before a booth is paired.

Media storage

CloudBooth stores live photos/media in the organisation’s tested private Cloudflare R2 target. Local server/NVMe storage is used only for cache, upload staging and render/export scratch. Storage is normally configured by a SuperAdmin before an organisation goes live.

1. Find your way around the application

The main Studio areas each have a distinct job. Analytics & Gallery is where completed captures are reviewed; Event Designer is where experiences are built; Booth Control is where paired devices are monitored and controlled; Logs is where errors and request details are investigated; and Settings contains organisation-wide configuration.

CloudBooth Studio interface with the main application navigation visible
Example Studio navigation. Use the top navigation to change operational areas; account, documentation and settings controls remain available from the header.
Detailed navigation & permissionsUnderstand roles and what to expect in each area.Normal event-day workflowA concise checklist once you already know the interface.

2. Create the event and import the design

  1. Open Event Designer and choose Create event, copy a template, or import an existing design.
  2. Name the event clearly so the same name is easy to recognise later in Booth Control and galleries.
  3. When importing PSD artwork, wait for parsing and preview generation to finish before editing layers.
  4. Confirm the artboard/canvas dimensions match the booth display or intended output.
  5. Rename important layers so actions are understandable later (for example Start button, Camera frame, Email input).
Your browser does not support embedded video.
Video guide: importing a PSD template. After import, continue with the layer tree and artboard checks described below.

See Starting in Event Designer and PSD import and placement for advanced import behaviour and diagnostics.

3. Turn the artwork into a guest flow

Think of each artboard as a screen in the guest journey. A normal flow might be Welcome → guest details → camera → review → delivery → thank you/reset.

  1. Select a visible layer in the layer tree or on the canvas.
  2. Use the action/input tools to give that layer behaviour. If a compatible layer is already selected, the tool applies directly instead of asking you to select it again.
  3. Link buttons to another page, capture action, reset action or another supported activity.
  4. Select the layer that should display the live camera and assign Camera Preview / Display. Configure the event-wide default capture look in Camera Studio; physical camera selection belongs in Booth Control only when a booth override is enabled.
  5. Add guest inputs only when the data is required for delivery, consent or reporting.
  6. Preview the experience and click through every path; do not test only the first screen.
Event Designer layout

Use the Artboards list for screens, the Layer Tree for stacking/selection, Layer Behaviours for actions and animations, the single-line Options bar for everyday layer controls, and Advanced only for uncommon type-specific settings.

Continue with Building interfaces, Actions and navigation and Camera and capture when you need a deeper explanation of a specific tool.

4. Install, pair and configure a booth

  1. On the booth PC, install the current Windows booth client from Downloads.
  2. Start the client and use its pairing flow to generate or display a pairing request/code.
  3. In CloudBooth, open Booth Control or the booth/fleet area and approve the device for the correct workspace.
  4. Give the booth a useful name that identifies its physical unit or location.
  5. Confirm it reports online, then verify the assigned/active event and content revision.
  6. Check the camera. The event uses its default Camera Studio image/capture settings; only enable a Booth Control override when this physical booth needs a different camera device, flip, rotation or local adjustment.
  7. Force Sync after meaningful design changes when you need the booth to refresh immediately.
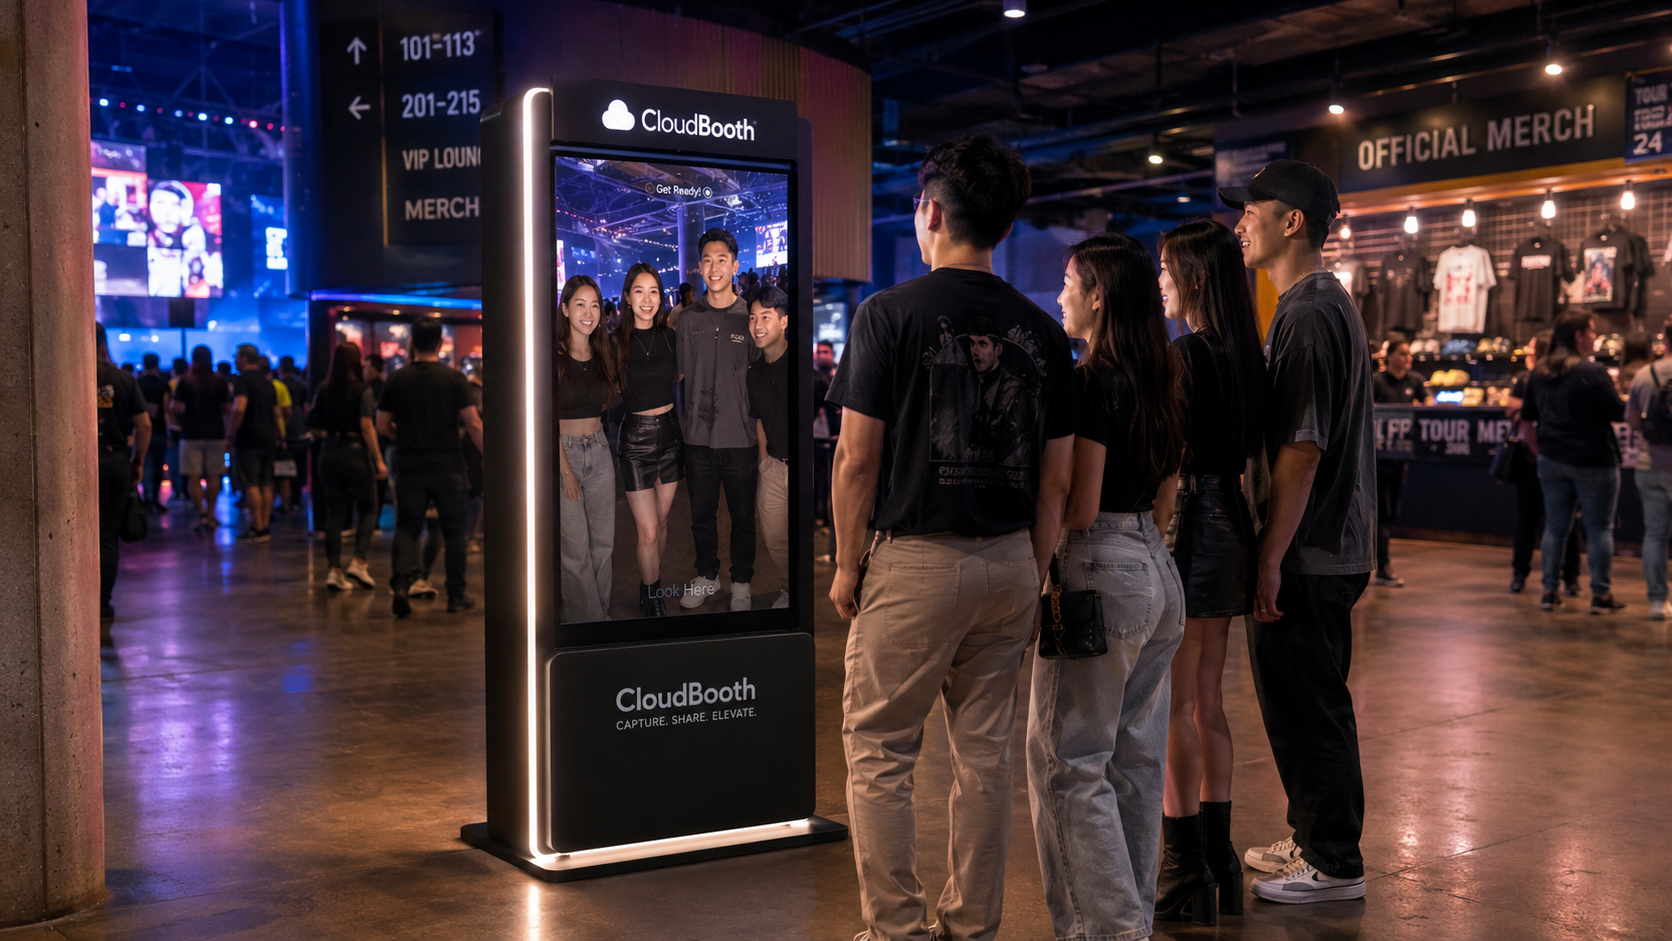
Example CloudBooth kiosk at an event
A booth is the local event device. The cloud workspace supplies the active event and remote controls; the booth client handles the guest-facing hardware experience.
Before opening the event

Confirm the booth is online, the active event and revision match, run Force Sync after final changes, then complete a real capture and delivery test on the physical booth.

5. Manage booths from Booth Control

Once a device is paired, Booth Control is the operational view you use before and during an event. You should not need to physically visit the booth for routine sync, restart or camera-adjustment tasks.

  1. Open Booth Control and find the device by its booth name. Start with the online/offline state and last-seen time.
  2. Open the booth details and compare its active event and content revision with the event you expect it to run.
  3. Use Force Sync after publishing a meaningful design change. Watch the booth state/logs until the new revision is reported.
  4. Use remote navigation/restart controls only when needed; prefer a sync before restarting the booth application.
  5. If one booth has a different physical camera orientation, set a device camera override for camera, horizontal/vertical flip, rotation or filter. Leave Booth Control overrides disabled for booths that should use the event defaults.
  6. Open Logs filtered to that booth when a command fails or the booth reports an unexpected state.
Booth Control essentials

Use device state and last-seen time first, compare active event/revision second, then use Force Sync or remote actions. Open the booth-specific logs when a command fails before re-pairing or restarting.

Green / onlineThe booth is connected. Still verify event and revision before opening doors.
Revision mismatchForce Sync, then inspect that booth's logs if it does not update.
OfflineCheck booth app/network/power and its last-seen time before re-pairing.

See Booth fleet & remote control for the full device-management reference.

6. Test, activate and operate the event

  1. Use Designer preview to test navigation and layout before involving hardware. Click through every route a guest can take.
  2. Save the event, then Force Active for an immediate event or configure its schedule.
  3. Confirm the Event Designer startup list marks the chosen event Active.
  4. In Booth Control, confirm the booth is online and has the expected event/revision, then run a real capture using the actual camera and printer configuration.
  5. Test every delivery route you plan to use: public gallery, QR, email and/or SMS. Use a real phone/email destination when possible.
  6. Reset to the welcome screen and complete a second full test after the final sync so you know the booth can repeat the experience cleanly.
  7. During the event, keep Booth Control available for remote actions and Logs/Troubleshooting for failures. Afterward use Analytics & Gallery to review captures and delivery sessions.
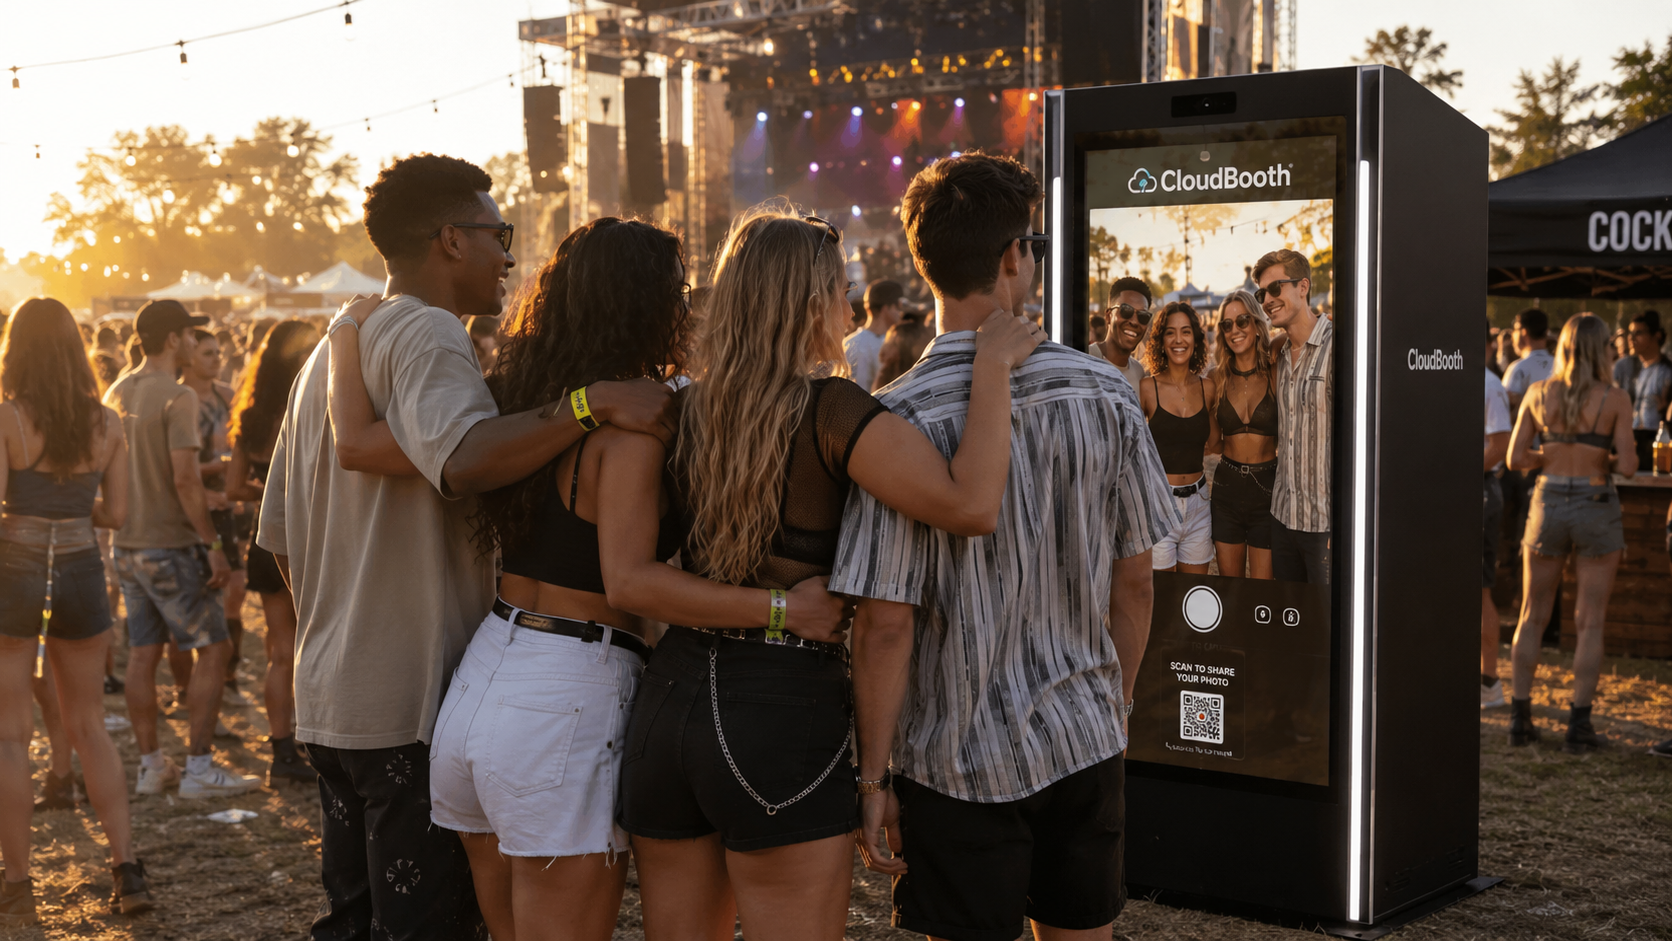
CloudBooth kiosk operating at a live outdoor event
Final testing should use the same booth, camera, display, printer and delivery paths that guests will use on event day.
Activation & schedulingHow active events and schedules interact.Manage boothsRemote control, sync and camera overrides.TroubleshootingFind a fault by Editor, Booth, Gallery, Delivery or platform area.

1. Getting started

Access, navigation and permissions

Sign in at /admin/login. Complete authenticator MFA when required by the platform or your workspace. The top navigation contains the organisation tools available to your account:

AreaPurposeTypical permission
Analytics & GalleryReview hosted captures, delivery details and event totals.Workspace access
Event DesignerCreate, edit, schedule and activate experiences.Edit designs
TemplatesReuse approved designs or publish workspace templates.Edit designs
LogsInvestigate booth events, warnings and errors.Workspace administrator
SettingsProfile, plans, security, roles, galleries, booths, APIs and messaging.Varies by tab
Role-based access: hidden controls are usually unavailable because of permissions or plan entitlements. Ask a workspace administrator before treating a missing control as a fault.

Recommended daily workflow

  1. Create or open the event in Event Designer.
  2. Confirm the guest flow, delivery templates, capture fields and schedule.
  3. Save and activate the event, or allow its scheduled block to start it.
  4. Check Booth Fleet in Settings to confirm the required booth is online and synchronised.
  5. Run a complete guest test: capture, delivery, public gallery and reset.
  6. Monitor Logs during the event when a booth or delivery behaves unexpectedly.
  7. Review Analytics & Gallery after the event, moderate content, resend links and export files or lead data.

2. Analytics & galleries

Analytics & Gallery overview

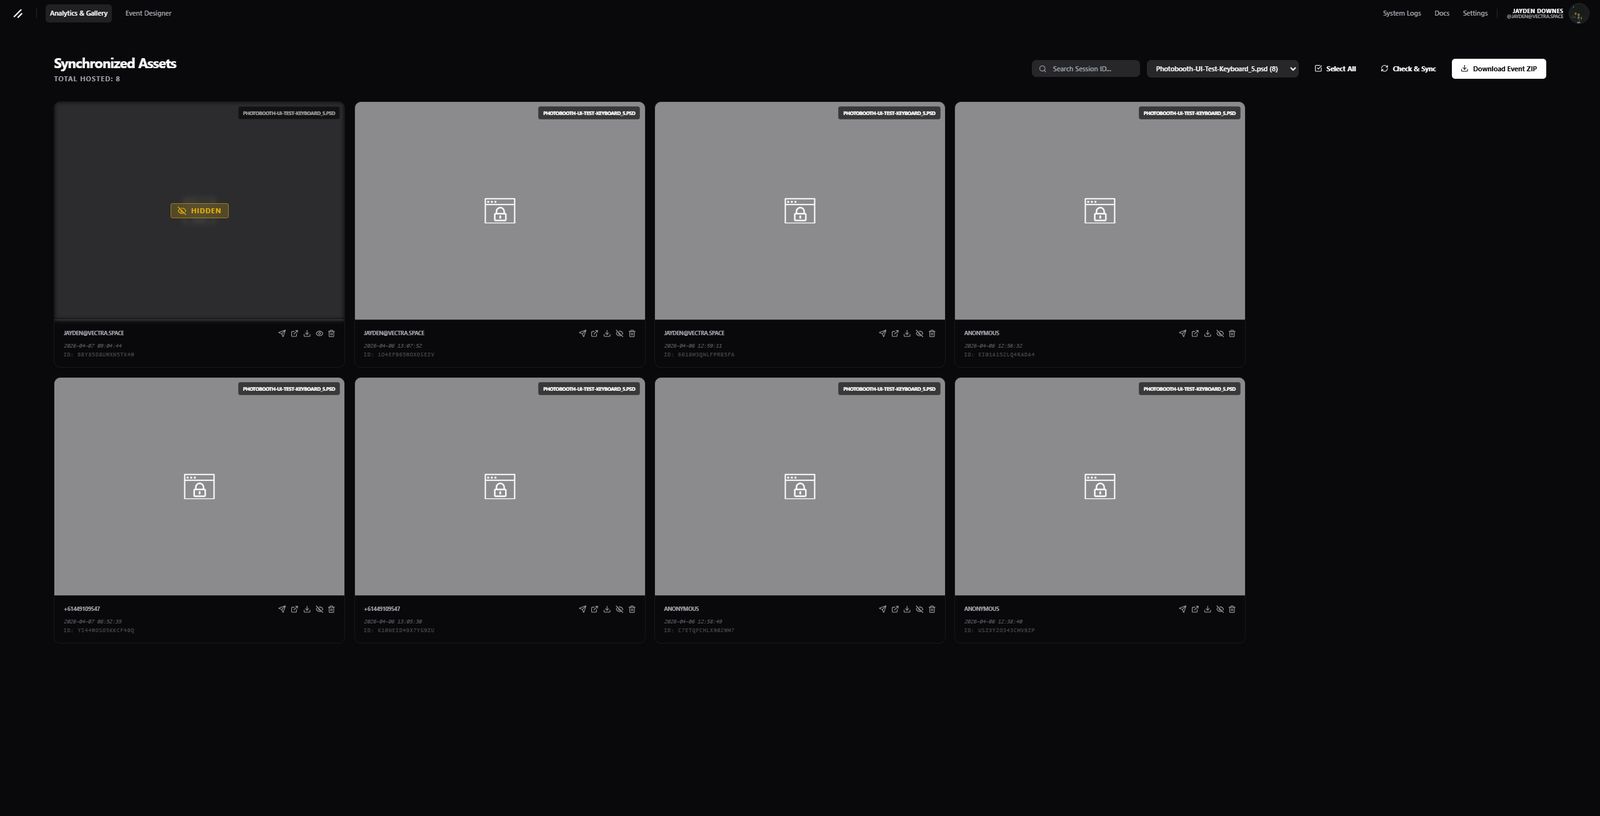
The organisation dashboard combines operational analytics with gallery management. It shows the total number of active hosted captures, counts by event and the captures on the current page. Detailed plan usage is available in Billing and Settings.

  • Event filter: show all events or one event and its capture count.
  • Page search: filters session references on the current page only.
  • Pagination: prevents large libraries from loading every image at once.
  • Thumbnail previews: use optimised images; opening or downloading loads the original file.
  • Live updates: new uploaded captures can appear without a full page refresh.
  • Force Sync: asks connected booths to refresh cloud event data.

This screen is designed for event operations and content management. It is not a marketing attribution dashboard; guest data and consent records are exported per event from Event Designer.

Analytics and gallery administration screen
The dashboard combines event filtering, hosted capture counts and gallery moderation.

Managing captures and sessions

Single capture actions

  • Open: view the full-resolution image and move between items.
  • Resend: send the gallery link to a new email address or phone number.
  • Gallery: open the guest-facing session.
  • Download: download the original image.
  • Hide/Restore: remove or restore public access without deleting files.
  • Delete: permanently remove the session and stored files.

Bulk actions

  • Select cards individually or use Ctrl/Cmd+A for the current page.
  • Download selected sessions as an archive.
  • Hide, restore or delete selected sessions.
  • Destructive actions require confirmation and cannot be undone after permanent deletion.
Hide versus delete: hiding preserves the files and allows restoration. Deleting removes the session from the database, storage and thumbnail cache.

Guest galleries and secure event links

Each session has a guest gallery with optimised previews, full-screen viewing and a ZIP download. The help panel displays the session reference so support can identify the affected gallery.

Workspace administrators can create broader guest event links from Settings → Public Gallery:

  • Expose all current and future events, or selected events only.
  • Add an expiry date.
  • Add an optional password.
  • Copy, disable, re-enable or delete the link.
  • Review the number of times a link has been opened.

3. Event Designer

Creating and opening designs

Open Event Designer and choose one of these starting points:

  • Upload PSD or AI: imports Photoshop artboards or PDF-compatible Illustrator artboards. Illustrator text, vectors, groups and embedded images remain object-editable where the source conversion supports them.
  • Create blank: starts an empty design using the current default canvas size.
  • Create from template: installs a global or workspace template as an editable copy.
  • Open event: continue editing an existing PSD, Illustrator-derived or JSON design. Multiple authorised users can open the same event and collaborate live.
  • Duplicate: copy an event under a new name before making variations.

Event names must be unique within the workspace. Deleting an event removes its design files; hosted guest galleries remain separate unless explicitly deleted.

Understanding the editor

AreaUse
ArtboardsThe screens in the guest journey. Add, rename, reorder or delete canvases.
CanvasThe visual working area. Draw, position, resize and rotate elements.
Tool barSelection, shapes, text, media and interactive zones.
Layers & behavioursLayer order, visibility and grouping plus selected-layer actions, animations and modifiers. Drag the divider to resize Layer Tree and Layer Behaviours.
Options barPhotoshop-style, single-line controls for the selected layer. It hides when no layer is selected. Use Advanced only for uncommon type-specific controls.
TimelineAnimation triggers, delays, sequence and preview.
DeploymentEmail, SMS, data fields, schedule and active event controls.

Artboards, layers and canvas editing

Artboards

  • One artboard normally represents one guest screen.
  • Drag artboards to change their order. Navigation actions use artboard IDs, so links remain associated after reordering.
  • Add blank artboards for new steps and use clear names such as 01 Welcome, 02 Capture and 03 Delivery.
  • The schedule applies to the event, not to individual artboards.

Layers

  • Drag layers to change front-to-back order or move them into folders.
  • Rename layers with unique, descriptive names. The editor prevents duplicates because actions are stored by layer name.
  • Duplicate, hide, show, colour-tag or delete layers from the context menu.
  • Use the layer tree to select objects that are difficult to click on the canvas.
  • Use aspect-ratio lock when resizing images, videos or elements that must not distort.

Tools, Options bar and advanced properties

Visual tools

  • Select & Move: position and resize selected layers.
  • Rotate: rotate an element on the canvas.
  • Transparency mode: test click-through areas over transparent artwork.
  • Text: draw editable text with font, size, colour, alignment, bold and italic controls.
  • Shapes: draw rectangles, circles or triangles with fill, opacity, border, line style and radius.
  • Image: upload PNG or JPEG assets.
  • Animation: upload video or GIF media.

Interactive tools

  • Keyboard: map on-screen keys to visual layers.
  • Camera trigger: define the area that starts a capture.
  • User text input: define a destination for guest-entered text.
  • QR location: reserve the area where the booth displays a session QR code.
  • Webcam mask: define the live camera preview area.
  • Page link: navigate to another artboard or finalise delivery and reset.

Options bar: selecting a layer opens the compact two-thirds-width Options bar with the controls used most often for that layer. Text layers expose font family, style/weight, size (px), colour, leading, tracking, alignment and character toggles; visual layers expose applicable transform, fill/stroke, crop/fit and opacity controls. Deselecting all layers hides the bar. Advanced opens only the additional controls relevant to the selected type in a movable palette on the canvas.

Fonts: use standard fonts, request access to local browser fonts, or upload TTF, OTF, WOFF or WOFF2 files. Uploaded fonts are stored with the workspace so paired booths can retrieve them. Illustrator imports retain the source family name and show a missing-font warning until the family is loaded, uploaded or replaced.

Professional editing controls

  • Shift/Ctrl/Cmd-click for multi-selection; drag or resize the selection as one unit.
  • Enter exact X, Y, width, height, angle and opacity values.
  • Set fills, outlines, stroke width, blur, drop shadow and artboard background.
  • Align, distribute, group, ungroup and change front-to-back order.
  • Use Ctrl/Cmd+Z to undo, Ctrl/Cmd+Shift+Z or Ctrl/Cmd+Y to redo, Ctrl/Cmd+G to group and Ctrl/Cmd+D to duplicate.
  • The collaboration bar shows other editors, their current selection and live pointer position. Changes are broadcast across application nodes.

Visual augmented-reality composer

Open the face-scan button in Event Designer. Saved AR designs has a + button; one saved design can contain any number of face props, virtual guests, backgrounds and custom-code effects.

Face props

  1. Add Face prop and upload a transparent PNG, WebP, JPEG or GIF.
  2. Drag it on the sample head and adjust size and rotation.
  3. Choose first person, everyone, or up to a maximum number of faces.
  4. Optionally link one or more visible screen assets. Tapping a linked sunglasses button toggles only that effect for the booth session.
  5. Select the camera-mask layers where the design should run, then save.

Virtual guests

Upload the guest artwork, drag and scale it beside the sample group, and choose instant, delayed or linked-asset activation. Only show when people are visible prevents an empty camera view from displaying the guest.

Background replacement

Choose a solid colour, gradient or image. The built-in edge-colour cutout is intended for plain, evenly lit backdrops; adjust sensitivity in the effect settings. For agency segmentation models or specialist tracking libraries, add Custom code and use the camera bridge.

Tracking support: face props use the browser FaceDetector when available. Test the exact booth browser and camera before an event. A custom sandboxed effect can supply a different tracking or segmentation implementation without receiving CloudBooth cookies or organisation secrets.

Interactive canvas and open experience bridge

Interactive modules are saved and usable immediately; there is no approval workflow or editor-facing capability/score/player/frame-rate form. Code still runs in an opaque script-only iframe, isolated from CloudBooth cookies, organisation secrets and the parent DOM.

Wildcard application events

await CloudBooth.ready;
const stop = CloudBooth.events.on('*', (payload, name) => {
  console.log(name, payload);
});
await CloudBooth.events.emit('game.round.completed', { score: 250 });

Built-in names include asset.clicked, asset.<layer name>.clicked, ar.trigger, capture.completed, activity.updated, artboard.changed and camera.output. Custom names can use any stable dot-separated convention.

Receive and return camera frames

const stopCamera = await CloudBooth.camera.subscribe(async (frame) => {
  image.src = frame.dataUrl;
  // Draw or process the image in your own canvas.
  await CloudBooth.camera.publish(outputCanvas, { effect: 'agency-filter' });
}, { fps: 15, maxWidth: 1280 });

Capture and Venue Activities

await CloudBooth.media.capturePhoto({ countdownSeconds: 3 });
await CloudBooth.media.captureMultiPhoto({ multiPhotoCount: 3 });
await CloudBooth.media.captureBurst({ burstCount: 6, burstIntervalMs: 250 });
await CloudBooth.media.recordVideo({ videoDurationSeconds: 8 });
await CloudBooth.activity.increment('reaction-leaderboard', points, {
  displayName: playerName
});

External JavaScript libraries are declared with an HTTPS URL and SHA-384 Subresource Integrity hash. They execute inside the same isolated iframe. Activity IDs remain event-scoped and activity writes require a unique idempotency key internally, so retries do not double-count.

Actions, navigation and transitions

Draw or select a layer and assign it as an interactive area. Page links can target another artboard or the special Send Photos & Reset action.

  • Instant: changes screens immediately.
  • Crossfade: fades into the target.
  • Push Left / Push Right: slides the new screen horizontally.
  • Slide Up: introduces the target from below.
  • Duration: sets transition time in milliseconds.

Use large hit areas, avoid overlapping interactive zones and test every branch of the guest flow. Transparent artwork can still contain a clickable layer, so use transparency mode to verify the result.

Action & Animation Sequencer

The existing animation timeline is also CloudBooth's action sequencer. Select a layer and use the Layer Behaviours panel directly beneath the Layer Tree to see everything attached to that layer without expanding every action inside the tree itself. Compact badges on the Layer Tree indicate whether a layer has animations, actions/sequences or modifiers.

Use the On press / Page load toggle for quick additions, or right-click a layer, canvas hotspot or timeline track for rapid authoring. A single layer can participate in multiple independent sequences—for example, fade in five seconds after a press, fade out later, capture a burst, reset its animation state and then move to another artboard.

  • Entrance: Fade/Zoom/Slide In reveals a hidden layer. Entrance blocks are shown in green.
  • Emphasis: Pulse, Shake and Flash animate an already visible layer. Emphasis blocks are shown in yellow.
  • Exit: Fade/Zoom/Slide Out removes a visible layer. Exit blocks are shown in red.
  • Timing: every animation exposes Duration, Delay (Time Before), Hold (Time After) and Easing.
  • Relative sequence: With Previous runs in parallel; After Previous waits for the preceding block's resolved Delay + Duration + Hold. You do not need to calculate absolute millisecond keyframes.
  • Triggers: start a sequence On Page / Artboard Load or On Layer Press.
  • Media actions: start, pause, stop or restart a video and trigger a sound effect.
  • Booth actions: run a configured camera trigger, clear the pending photo buffer, go to a specific artboard or reset a layer's animation state.

The Layer Behaviours panel is the quick editor: sequences started by the selected layer, action/animation blocks that target it and direct modifiers such as Camera Preview / Display are grouped separately with edit and delete controls. The timeline remains the sequencing surface and shows the same blocks at their resolved relative times, so scrubbing the playhead gives an immediate visual preview.

Camera blocks deliberately reuse an existing configured capture trigger rather than implementing a second simplified camera action. The complete photo, multi-photo, burst, countdown, interval, video and processing settings remain authoritative. CloudBooth also prevents an on-press sequence from invoking the exact same direct camera trigger that already fires from that press, avoiding accidental double capture.

Email, SMS and guest data

Email template

Edit the event-specific HTML email sent with the gallery link. Keep essential information in text, use a clear call-to-action and test links before the event.

SMS template

Use the available wildcards to create an event-specific message:

{{USER_NAME}}{{USER_EMAIL}}{{USER_PHONE}}{{EVENT_NAME}}{{PHOTO_LINK}}{{SESSION_ID}}

The editor shows the character count and supports a test message. Long messages may be split by the configured provider.

Guest data fields

Add required or optional fields before delivery. Supported types are text, email, phone, number, date, dropdown, long text, checkbox and consent. Each field has a stable key used in exports. Consent wording is stored separately and appears clearly in the Excel lead export.

Use Download Excel to export event leads and consent records.

Scheduling, activation and saving

  • Edit Schedule: drag on the calendar to create active blocks. Move or resize blocks and resolve overlap warnings.
  • Force Active: activates the current event immediately, overriding the normal schedule.
  • Autosave: changes are saved after edits. The artboard status shows saving and saved states.
  • Preview capture: the editor updates the event thumbnail used in event and template lists.
Before activation: save the event, confirm the paired booth is online, force a sync, then perform one complete capture and delivery test on the physical booth.

4. Building photobooth interfaces

Design a reliable guest flow

Build the interface as a short sequence where every screen has one clear purpose. A common production flow is:

  1. Attract: looping animation or branded welcome with a large Start action.
  2. Choice: optional format, background, language or experience selection.
  3. Data/consent: collect only information required for delivery or approved marketing use.
  4. Capture: show the webcam mask and a large camera trigger.
  5. Delivery: collect email/phone details, show the QR code or confirm that delivery is being prepared.
  6. Finish: use Send Photos & Reset so the session is finalised and the booth returns to the beginning.

Preparing Adobe files for import

Illustrator

  • Save the AI file with Create PDF Compatible File enabled.
  • Embed linked images. External file and web references are removed for security.
  • Keep text as text and use clear object/layer names.
  • Each PDF-compatible artboard is imported as an editor artboard in a background job.
  • Review complex live effects, mesh gradients, plugin objects and advanced text layouts after import; features without a reliable SVG equivalent may be simplified.

Photoshop

  • Create one Photoshop artboard per booth screen. If artboards are unavailable, top-level groups are used as screens.
  • Use the same dimensions and orientation for every artboard.
  • Give artboards and layers unique names before upload.
  • Keep button artwork, labels and backgrounds on separate layers when they need independent actions.
  • Rasterise effects that must look exactly the same if they depend on unsupported Photoshop behaviour.
  • Keep linked or smart-object dependencies embedded so the uploaded PSD is self-contained.
  • Compress large background images and videos before importing them.

After import, review every artboard at full size. The editor uses a composited preview for visual fidelity while retaining layer bounds for interaction mapping.

Your browser does not support embedded video.
PSD upload and event creation walkthrough.

Supported interface patterns

Simple tap-to-capture

Welcome → Capture → QR/Delivery → Reset. Use one camera trigger, one QR area and minimal guest input.

Lead capture

Add approved fields and consent wording before capture or delivery. Export the event spreadsheet after the event.

Email and SMS delivery

Map text input and keyboard layers, configure event templates and test both providers before opening.

QR-only delivery

Place a large QR area on the final screen and keep it visible long enough for guests to scan.

Animated attract experience

Use an on-load looping video, then navigate to a static or animated capture flow when the guest taps Start.

Keyboard or arcade input

Choose email, phone, full or mini keyboard layouts and map each key to the corresponding visual layer.

Multi-option experience

Create a choice screen with links to separate artboard branches, then route every branch to a shared delivery screen.

Multi-language flow

Create separate language branches and use page links to move through translated artboards. Keep the final delivery logic consistent.

Interface quality checklist

  • Use touch targets large enough for quick, imprecise interaction.
  • Keep primary actions in consistent locations across screens.
  • Use high contrast and avoid placing important text over live camera content.
  • Provide a visible way forward; avoid screens that depend only on an animation finishing.
  • Prevent accidental double actions by avoiding overlapping hotspots.
  • Use short file names, unique layer names and predictable artboard numbering.
  • Optimise images and media before upload; visual quality above the booth display resolution adds transfer time without improving output.
  • Test the flow using the same screen resolution, touch input, camera and network conditions used at the event.
  • Confirm the final action sends the gallery and resets the session.

5. Templates and event reuse

Using the template library

The Template Library stores reusable snapshots of completed designs.

  • Use template: install the template as a new workspace event.
  • Edit a copy: create a copy and open it immediately in Event Designer.
  • Publish existing design: snapshot a workspace event with a title, category, description and tags.
  • Manage: update descriptive information and availability without changing the saved design snapshot.
  • Delete: remove a template you own. Events previously created from it are unaffected.

Organisation templates are private to the workspace. Global, public, featured, premium and plan-restricted controls are managed by platform administrators.

Recommended template process

  1. Build and test the source event.
  2. Remove event-specific dates, contact details and temporary branding.
  3. Publish the clean design as a workspace template.
  4. Create event-specific copies rather than editing the master template.

6. Booths, pairing and deployment

Pairing a booth

  1. Open Settings → Booth Fleet & API Keys.
  2. Enter a descriptive booth name and generate a temporary pairing code.
  3. Install or open the Windows booth client.
  4. Enter the public cloud server URL and pairing code.
  5. Wait for the booth to appear in Live Fleet and confirm its version, IP, active event and last template sync.

Pairing codes are temporary. Device tokens shown after pairing should be revoked when a booth is retired, lost or reassigned.

Monitoring and controlling booths

The live fleet card displays booth version, preview, CPU, memory, uptime, active event and last template sync. Available remote commands include:

  • Force sync: immediately request current designs and settings.
  • Restart app: restart the booth application without rebooting Windows.
  • Update: request the configured client update process.
  • Reboot PC: restart the physical operating system; use only when the booth is unattended or an operator has confirmed it is safe.

Commands require the booth to be connected. Check Logs when a command is sent but the expected result does not occur.

Booth tokens and developer API keys

These credentials serve different purposes:

  • Booth/device token: identifies a paired physical booth and is managed in the fleet area.
  • Developer API key: authorises external software using Authorization: Bearer <KEY>.

Full keys are displayed once. Copy them into an approved secret manager, never place them in client-side JavaScript and revoke them immediately when exposure is suspected.

7. Logs and troubleshooting

Using System Logs

Organisation users see logs from booths connected to their workspace. Platform administrators can additionally view server and cross-organisation logs. SuperAdmins can use Error Diagnostics to paste a user-facing reference ID and correlate the server exception with authenticated-browser warnings/errors, page, release, user, organisation and other recent incidents from the same user.

  • Filter by booth, severity, source and text.
  • Choose how many historical rows to load.
  • Select a connected booth card to filter directly to that node.
  • Pause live logs while investigating; resume to display queued messages.
  • Disable auto-scroll when comparing older entries.
  • Clear view removes rows from the browser only.
  • Delete matching logs permanently removes database rows matching the current filters.

Reading levels

  • Info/success: normal operations, connections, syncs and completed actions.
  • Warning: recoverable problems that may need attention.
  • Error/critical: failed actions, unhandled exceptions or unavailable dependencies.
  • Debug: detailed diagnostic messages.

Troubleshooting

Start with the category that matches what the guest or operator can see. Capture the event name, booth name, approximate time and any request ID or error code before changing configuration.

Editor & design
A tool appears to do nothing
  1. Confirm the correct layer is selected and unlocked.
  2. For camera preview/display, QR, input and action tools, select the target first; compatible tools apply directly.
  3. Check Layer Behaviours for assigned actions/modifiers and the Options bar for routine visual settings. Use Advanced only for additional type-specific properties.
  4. Save, reload the page, then search Logs for the request ID if persistence failed.
PSD artwork is misplaced
  1. Confirm artboard dimensions and PSD canvas dimensions match.
  2. Check group transforms and clipping masks in the source PSD.
  3. Re-import after simplifying unsupported smart-object/effect combinations.
  4. System Administrators can use PSD placement diagnostics; ordinary users should provide the source PSD and event name to support.
Live capture is blank in Preview
  1. Enable the preview camera.
  2. Grant browser camera permission.
  3. Confirm the layer is assigned as Camera Preview / Display.
  4. Check the event defaults in Camera Studio. If only one physical booth is affected, configure its camera-device override in Booth Control instead of changing the event default.
Booths & remote control
A booth is offline
  1. Confirm the booth PC and application are running.
  2. Check internet access and the configured cloud URL.
  3. Review the booth card’s last connection time.
  4. Filter Logs to that booth for connection, authentication or sync errors.
  5. Re-pair only after confirming the existing token is invalid or revoked.
The booth shows an old event
  1. Confirm the correct event is Force Active or within its schedule.
  2. Save the design and wait for Saved status.
  3. Use Force Sync for the affected booth.
  4. Compare the booth revision with the event revision and check Logs.
  5. Restart the booth app only after a successful sync fails to refresh the interface.
Camera orientation/device is wrong on one booth
  1. Keep the event Camera Studio settings as the normal default.
  2. Open the affected booth in Booth Control.
  3. Set a device override for camera, rotation, horizontal/vertical flip or filter.
  4. Clear the override to return the booth to the event default.
Capture, galleries & delivery
A guest did not receive a gallery
  1. Find the session in Analytics & Gallery.
  2. Confirm the captured email address or phone number.
  3. Use Resend with corrected details.
  4. Send a provider test from Settings.
  5. Filter Logs by booth, session/reference and delivery source.
A gallery is unavailable
  1. Confirm the session has not been hidden or deleted.
  2. For event-sharing links, confirm the link is enabled, not expired and the password is correct.
  3. Check photo/object storage status.
  4. Search Logs for storage or gallery errors.
Sign-in, security & permissions
Login or MFA says session expired
  1. Use the configured HTTPS public URL.
  2. Sign in again; CloudBooth returns you to the protected page you originally requested.
  3. If the loop persists, clear stale site cookies and verify secure-cookie/public-URL settings.
  4. For MFA setup, use the newest QR code shown by the application.
A control is missing
  1. Confirm your workspace and role.
  2. Check whether the feature requires an entitlement.
  3. Ask a workspace administrator to review RBAC before treating it as an application fault.
Server, storage & infrastructure
Storage or database operations fail
  1. Check the public System Status page for the most recently recorded service health.
  2. SuperAdmins can open Platform Status for 14-day resource graphs, dependency-path checks and the underlying recorded telemetry.
  3. Use Error Diagnostics when a user supplies a reference number; use System Logs for broader operational filtering.
  4. Check available capacity and the organisation’s configured data location.
  5. Do not delete volumes or reconfigure storage merely to clear an error; resolve the reported dependency or policy issue.
Booth troubleshooting order

Read booth status and last-seen time → filter Logs to the booth → identify the failing action → Force Sync when content is stale → verify the expected revision and complete a real capture test.

Application error reference

These are the structured error codes emitted by the current application. Search this page for the code shown in the toast, response or Logs.

CodeMeaningResolution
account_sign_in_requiredThe requested action requires an authenticated account.Sign in; you should return to the page or action you originally requested.
authentication_validation_unavailableThe server could not validate authentication state.Check identity/database dependencies and retry after service health is restored.
browser_booth_event_unavailableThe Browser Booth cannot load a usable event.Activate/schedule an event, confirm access, save it and force the booth/browser to refresh.
cloudflare_access_requiredThe deployment expects an approved Cloudflare access/origin request.Use the configured public URL and verify Cloudflare/origin protection configuration.
database_busyThe database is temporarily locked or under contention.Retry after the current write completes; investigate long-running or repeated writes if it persists.
development_access_requiredThe development environment gate must be completed first.Authenticate through Development Access, then continue to the original URL.
email_verification_requiredThe account email must be verified.Open the latest verification email or use the resend action, then retry.
entitlement_requiredThe workspace plan does not currently include the requested feature.Review Plan & Features or ask a billing administrator to enable the required entitlement.
https_requiredA security-sensitive feature requires HTTPS.Open the application through its configured HTTPS URL rather than HTTP/IP access.
internal_server_errorAn unexpected server-side exception occurred.Record the request ID and time, search Logs, then resolve the underlying exception/dependency.
invalid_mfa_codeThe submitted authenticator code was not accepted.Use the current six-digit code, confirm device time is accurate and retry.
mfa_not_configuredThe requested MFA action needs an authenticator that is not configured.Complete Security/MFA setup before retrying the protected action.
mfa_secret_key_unavailableThe server cannot decrypt or access the stored MFA secret.Check application encryption-key configuration; an administrator may need to reset/re-enrol MFA.
mfa_setup_requiredThe account must complete MFA enrolment.Finish the MFA setup screen before using protected application areas.
object_storage_assurance_requiredThe selected object-storage target does not satisfy the organisation’s assurance policy.Use an approved target/region or update the policy only through authorised governance change.
passkey_errorA WebAuthn/passkey operation failed.Retry on the configured HTTPS hostname; confirm browser/device passkey support and inspect the detailed message.
passkey_not_registeredNo matching passkey exists for this account/site.Use password + MFA or register a passkey from Security first.
photo_storage_delete_failedA requested photo/session could not be removed from storage.Check storage connectivity/permissions, retry, then inspect Logs for the object/path that failed.
photo_storage_unavailableConfigured photo storage cannot currently be used.Check the organisation’s Cloudflare R2 target, bucket-scoped credential profile, round-trip test status and provider connectivity. Local cache capacity is secondary.
plan_consequencesA plan change requires acknowledgement of feature/limit consequences.Review the displayed consequences and explicitly confirm before applying the plan change.
plan_limit_reachedThe workspace has reached a plan allowance.Remove unused capacity, purchase/add capacity or change plan before retrying.
request_validation_failedSubmitted fields or payload do not match the API/application validation rules.Correct the highlighted fields; for integrations compare the payload with the API documentation.
session_expiredThe browser session is no longer valid.Sign in again; CloudBooth preserves the protected destination where possible.
sovereign_support_location_deniedThe requested support/data operation conflicts with sovereignty policy.Use an approved support/data location or obtain the required policy approval.
storage_location_mismatchThe requested operation is targeting a different location than the organisation’s assigned data location.Use the assigned storage location or correct the organisation/infrastructure mapping.
storage_target_in_useThe storage target cannot be removed/changed because data or configuration still references it.Reassign dependent organisations/data first, then retry the change.
storage_target_not_accessibleThe server cannot reach or authenticate to the configured storage target.Check network path, credentials, permissions and target health, then run the storage test again.
storage_test_failedA storage connectivity/operation test failed.Read the detailed test result, correct network/credentials/path/permissions and rerun the test.
template_upgrade_requiredThe selected template requires a plan/entitlement not available to the workspace.Choose an included template or update the workspace subscription/entitlement.
workspace_requiredThe account has no active workspace selected/available.Create or select a workspace before continuing.

HTTP status errors without a structured code follow the same process: 400 = invalid request, 401 = sign-in/session required, 403 = permission/policy denied, 404 = resource not found, 409 = state/conflict, 422 = field validation, 429 = rate limited and 5xx = server/dependency failure. Use the request ID in Logs when one is supplied.

8. Billing and usage

Billing Centre

Open Settings → Plan & Features → Open subscription & invoices. Billing permissions determine which actions are available.

TabUse
OverviewUpcoming invoice, outstanding balance, credit balance and high-usage allowances.
Plan & subscriptionCompare plans, preview changes, schedule or apply upgrades/downgrades and manage cancellation.
Usage & allowancesReview current consumption and limits for booths, users, storage, events, galleries, templates, communication use and enabled features.
Email & SMS creditReview prepaid communication balance, purchase credit, inspect rates/usage and confirm whether CloudBooth or a workspace provider is active.
Payment methodsOpen the secure Stripe portal to add or update card details.
InvoicesSearch, filter, view, download or pay invoices and review invoice status.
Billing profileMaintain the organisation billing name, contact details, address and tax/business information used on invoices.
Add-onsAdd or adjust extra capacity without changing the base plan.
HistoryReview account events and configure billing notifications.

Changing plans safely

  1. Select a plan and billing interval.
  2. Choose immediate change or next renewal.
  3. Preview price, proration, credits and feature consequences.
  4. Acknowledge any usage or feature loss.
  5. Apply the change.

Cancellation options may include end-of-period cancellation, immediate cancellation, downgrade, pause or a retention request. Read the displayed data-retention and billing consequences before submitting.

Billing tasks

  • Purchase communication credit: open Email & SMS credit, review the current balance/rate, choose an amount and complete the secure checkout.
  • Update payment details: open Payment methods and continue into the secure payment-provider portal. CloudBooth does not expose complete card details in the application.
  • Download an invoice: open Invoices, filter/search the account history, then open or download the required invoice.
  • Add capacity: use Add-ons when extra storage/booths/users are available without changing the base subscription.
  • Billing notifications: use History & notifications to review billing events and notification preferences.

9. Settings and workspace administration

Settings reference

Personal Settings

Update profile photo, name, email and phone. Password, passkey, authenticator and recovery controls are grouped in the dedicated Security tab.

Plan & Features

View the current plan, allowance usage, plan comparisons and available add-ons. Billing administrators can open the Billing Centre.

Security

Change password, register and remove passkeys, review authenticator status and manage recovery. Passkeys or authenticator codes can approve privileged step-up actions.

Roles & Permissions

Create roles and assign permissions for design editing, hardware control, team management, system settings and billing actions. Grant only the access required for each job.

Gallery Access

Open the event-aware Gallery Access dialog from an event row or Event Designer deployment menu to create, edit and review guest links across one or more events.

Administration pages

Platform Status, Error Diagnostics, Cloudflare operations, Database Explorer, System Variables and System Updates are standalone SuperAdmin pages. Platform/edge telemetry is recorded on a background cadence so opening a dashboard does not itself trigger every infrastructure probe; use Refresh when a new on-demand sample is required.

Booth Control

Pair devices, download the client, review live booth telemetry, manage device/API pairing and send remote commands. Booth synchronisation configuration belongs here rather than in a separate Settings tab.

Developer API keys

Create and revoke approved integration keys from Booth Control → Developer API & integrations. Keys are shown in full only once.

Alert Preferences

Choose immediate, daily digest, in-app or email delivery for personal platform-health alerts and workspace billing alerts.

SMS Gateway

Configure Twilio or a custom HTTP gateway, limits, timeout, authentication, payload template and test delivery.

Users, roles and security

  • Invite a member with name, email, role and temporary password.
  • Require password changes and MFA according to your organisation’s security policy.
  • Use custom roles instead of sharing administrator accounts.
  • Remove access promptly when a user leaves or changes duties.
  • The last organisation administrator cannot be removed.
  • Revoke exposed API or booth credentials and review Logs for unexpected activity.

Configuring SMS delivery

Choose Twilio for native account SID/auth token settings or Custom HTTP Gateway for another provider.

  • Custom gateways support POST, PUT or PATCH.
  • Send JSON or form-encoded payloads.
  • Configure no authentication, bearer token, custom header, basic auth or API key.
  • Use gateway placeholders {{TO}}, {{MESSAGE}} and {{SENDER}}.
  • Set accepted success HTTP codes, daily/monthly limits and timeout.
  • Send a test before enabling event delivery.

10. Notifications and integrations

Notifications

The notification centre contains security, onboarding, product, usage and billing events. Unread items appear in the header. Use Clear notifications to dismiss the current notification history for your account without deleting shared organisation records.

  • Open View all to review notification history.
  • Configure email and in-app delivery by category.
  • Keep security notifications enabled.
  • Use billing preferences for invoice, payment, card, trial, plan, cancellation, usage and quote updates.

Developer API

Use the separate public API reference for supported integration, event, gallery, booth and device endpoints. Browser login, MFA, passkeys, billing-session, administrator, updater and platform-operation routes are excluded. System Administrators can use the protected Administrator API reference.

  • Use HTTPS and bearer authentication.
  • Store keys server-side and rotate them regularly.
  • Respect organisation isolation; a key cannot access another workspace.
  • Use request IDs and Logs when reporting failed requests.

11. Frequently asked questions

FAQ

Why can’t I see a feature?

Your role may not include the required permission, or the feature may not be included in the workspace plan. Check Plan & Features and ask a workspace administrator.

Does Force Active replace the schedule?

It immediately activates the selected event. Review the schedule afterwards so the next planned event activates at the intended time.

Does deleting an event delete its galleries?

No. Event design files and hosted gallery sessions are managed separately. Delete gallery sessions from Analytics & Gallery only when the files should be permanently removed.

Why does gallery search not find an older session?

The search box filters the current page. Use the event filter and pagination, then search the relevant page.

Why is the first gallery preview slower?

Existing full-size images may need a thumbnail generated on first view. Later requests use the cached WebP thumbnail.

Can hidden photos be restored?

Yes. Hidden sessions remain stored and can be restored. Permanently deleted sessions cannot be recovered through the application.

Can I use my own fonts?

Yes. Upload TTF, OTF, WOFF or WOFF2 fonts from the text toolbar. Confirm the licence permits distribution to booth devices.

Can one event have multiple languages?

Yes. Build a language selection screen and separate translated artboard branches, then route them to common capture and delivery steps where suitable.

How do I collect consent?

Add a Consent guest data field with approved wording, mark it required when appropriate and export the event Excel file after the event.

What happens when storage reaches its limit?

New uploads or event creation may be restricted according to the plan. Delete unneeded content, add storage or change plan before the limit is exceeded.

Why did an SMS fail?

Check that SMS delivery is enabled, the provider credentials and sender are valid, the number format is supported, limits are not exceeded and the success HTTP codes match the provider.

Where should I start troubleshooting?

Check System Status, the affected booth card and filtered Logs. Record the booth name, event, session ID, time and request ID before contacting support.

Can I edit the original template after using it?

Using a template creates an event copy. Editing or deleting the library template does not change events already created from it.

How do I protect a guest event link?

Open Gallery Access from the event table or Event Designer Deployment menu, choose one or more events, add an expiry and set an optional password.

Who can change billing?

Only users with the relevant billing permissions or platform-level access can change plans, payment details, add-ons or cancellation settings.

Contacting support

Include enough information to reproduce the problem:

  • Organisation and affected user.
  • Booth name/node ID and software version.
  • Event name and session ID where relevant.
  • Exact time and timezone.
  • Steps taken and expected result.
  • Relevant log message or request ID.
  • Screenshots without passwords, API keys or guest personal information.
Email [email protected]
Photobooth Cloud

Create, deploy and manage memorable photobooth experiences from one secure workspace.

ProductTemplate galleryPlansEditing studioBillingBooth client
ResourcesOrganisation guidePublic API referenceSecurity & complianceSystem statusHelp centreChangelogContact support
LegalTerms of ServicePrivacy Policy
© 2026 ClopudBooth.